So here is our own little Ms Messy Face after dinner with her new romper on. This is Ottobre issue 3/2006 (Summer 2006) #5. It has snaps at the crotch for easy changes and an invisible zipper in the back that I would not have tackled a month ago. Woohoo to me and I'm on a roll with zippers now. haha.
Tuesday, April 28, 2009

Tuesday, April 21, 2009
Retrofitting a waistband with buttonhole elastic
This is one post that I am migrating from my old blog to my new one as hopefully it will be useful!
ORIGINAL POST:
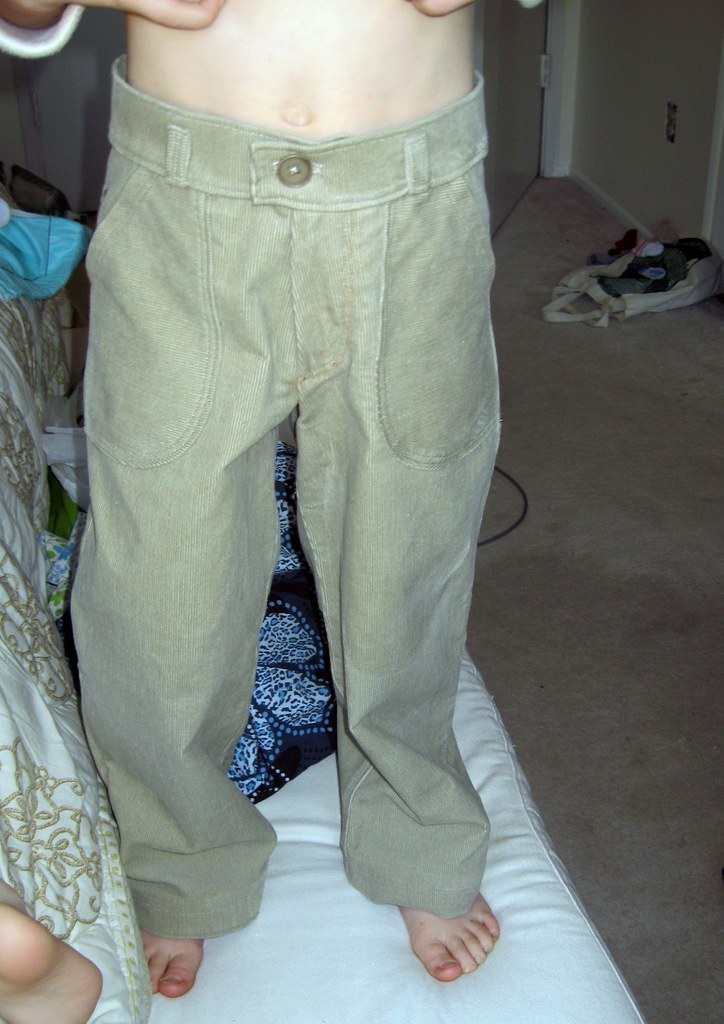
So, a while back I did Ottobre pants, slim fits, but they were still too large for Zach. I eventually set them aside for a growth spurt. He has had said growth spurt and they fit okay in length and better in hip now ... but still much too large in the waist.
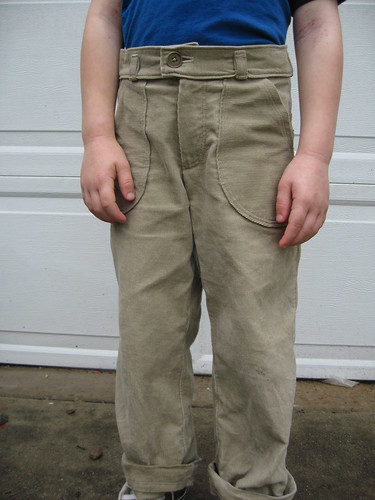
So original pants are here, but larger actually than they appeared, i.e., they fell down when he walked:
Thanks to the Ottobre English yahoo group, I was given verbal instructions on how to fit them, by inserting buttonhole elastic into the waistband. This would have been a lot easier had I done this in the first place by the way. But, they were already created and he wanted to be able to wear them, so I did the retrofit. Sorry the pictures are crummy but hopefully will be helpful to you all who need to do this for any of your tall skinny kids. :)
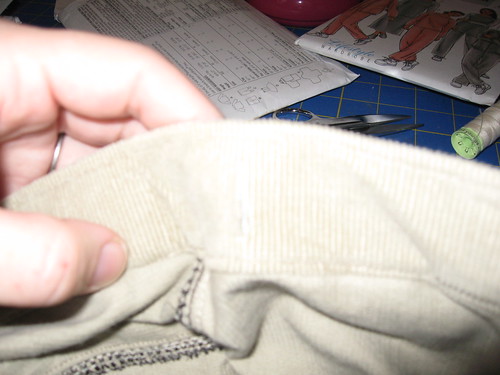
It is very very handy if you have an existing pair of pants with buttonhole elastic in them to refer to on placement. This is not essential, but it is helpful. Take the pair you need to modify and look on the inside of the waistband. Choose a spot for the opening for the elastic to go in. A good place for this is usually just past the side seams toward the front so that it would rest approximately between the side seam and the center front. There is going to be a button just past it so try to pick the place you think would be most comfortable on wearing. On the pants in the photo, I have my thumb at approximately that place. You can see the side seam in the photo:
Now get your seam ripper. Very carefully cut a vertical slit in the only the inner waistband at the site chosen above. Be careful not to cut the outer waistband (the part you see on the outside when the pants are being worn). The slit needs to be ideally the width of your buttonhole elastic.
In my pants example, the fabric is corduroy. It will fray badly if left just cut. If your pant fabric will not fray, you may be able to insert the elastic now. Most fabrics though you will need to do a handsewn buttonhole. Note you can probably sew the buttonhole first and then cut it open like you would on a machine; however, it is a little easier to cut first in this instance for me so I could be careful not to catch the outer waistband in my sewing. Anyhow, sew the buttonhole by hand. I did the extra step of adding Fray Check on the raw edges to help stop the raveling. I started at one end with tacks across the opening to reinforce the ends, down one side, wide across the buttom and back up the other side. Most anyone will end up with a prettier result than me because I really am bad at handsewing. LOL.
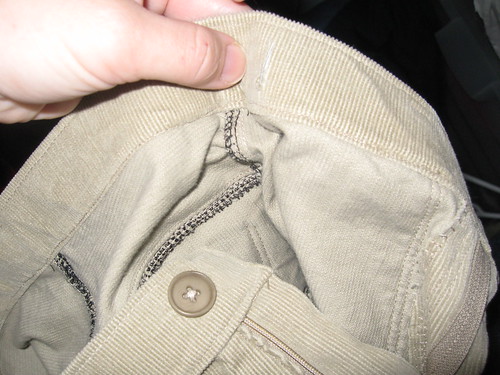
Starting the buttonhole sewing:

Do the buttonhole on both sides.
Now you need to sew a button on each side just a little ways in front of each hole. Mine are 1 inch from the buttonhole. Choose a button that comfortably goes through the holes in your buttonhole elastic but do not allow it to slip back through.
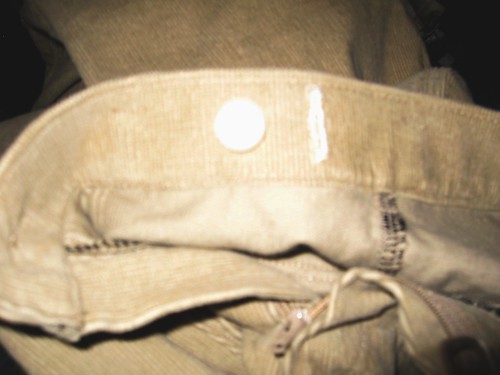
All that is left to do now is thread your buttonhole elastic into the casing. Cut a length of elastic the distance from one button to the other along the back waistband. The object is that if it were inside the waistband unstretched there would be no reduction in the waistband; the waistband would be the original length (so if your child grows you are all set!). Feed it through one end into your buttonhole created. I use a bodkin for it but a safety pin works well too. Hook one end on one button, pull it through and hook the other end on the other button. Adjust it by pulling tighter or loosening to fit your child. Put the button through the appropriate hole.

Enjoy the fact the pants no longer fall down!
ORIGINAL POST:
So, a while back I did Ottobre pants, slim fits, but they were still too large for Zach. I eventually set them aside for a growth spurt. He has had said growth spurt and they fit okay in length and better in hip now ... but still much too large in the waist.
So original pants are here, but larger actually than they appeared, i.e., they fell down when he walked:
Thanks to the Ottobre English yahoo group, I was given verbal instructions on how to fit them, by inserting buttonhole elastic into the waistband. This would have been a lot easier had I done this in the first place by the way. But, they were already created and he wanted to be able to wear them, so I did the retrofit. Sorry the pictures are crummy but hopefully will be helpful to you all who need to do this for any of your tall skinny kids. :)
It is very very handy if you have an existing pair of pants with buttonhole elastic in them to refer to on placement. This is not essential, but it is helpful. Take the pair you need to modify and look on the inside of the waistband. Choose a spot for the opening for the elastic to go in. A good place for this is usually just past the side seams toward the front so that it would rest approximately between the side seam and the center front. There is going to be a button just past it so try to pick the place you think would be most comfortable on wearing. On the pants in the photo, I have my thumb at approximately that place. You can see the side seam in the photo:
Now get your seam ripper. Very carefully cut a vertical slit in the only the inner waistband at the site chosen above. Be careful not to cut the outer waistband (the part you see on the outside when the pants are being worn). The slit needs to be ideally the width of your buttonhole elastic.
In my pants example, the fabric is corduroy. It will fray badly if left just cut. If your pant fabric will not fray, you may be able to insert the elastic now. Most fabrics though you will need to do a handsewn buttonhole. Note you can probably sew the buttonhole first and then cut it open like you would on a machine; however, it is a little easier to cut first in this instance for me so I could be careful not to catch the outer waistband in my sewing. Anyhow, sew the buttonhole by hand. I did the extra step of adding Fray Check on the raw edges to help stop the raveling. I started at one end with tacks across the opening to reinforce the ends, down one side, wide across the buttom and back up the other side. Most anyone will end up with a prettier result than me because I really am bad at handsewing. LOL.
Starting the buttonhole sewing:
Do the buttonhole on both sides.
Now you need to sew a button on each side just a little ways in front of each hole. Mine are 1 inch from the buttonhole. Choose a button that comfortably goes through the holes in your buttonhole elastic but do not allow it to slip back through.
All that is left to do now is thread your buttonhole elastic into the casing. Cut a length of elastic the distance from one button to the other along the back waistband. The object is that if it were inside the waistband unstretched there would be no reduction in the waistband; the waistband would be the original length (so if your child grows you are all set!). Feed it through one end into your buttonhole created. I use a bodkin for it but a safety pin works well too. Hook one end on one button, pull it through and hook the other end on the other button. Adjust it by pulling tighter or loosening to fit your child. Put the button through the appropriate hole.
Enjoy the fact the pants no longer fall down!
Monday, April 20, 2009
Ottobre 1/2009 #7 tunic/dress
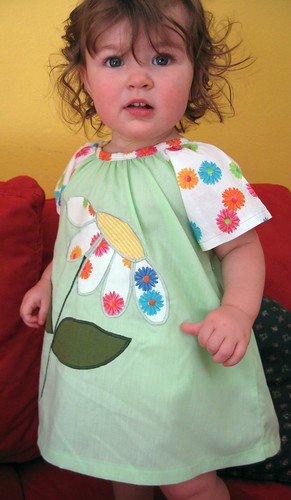
This is from Ottobre 1/2009 #7 the "kukkopilli" tunic top. I added the large flower applique from scrap fabrics. The design is from 100 Best Full-Size Quilt Blocks & Borders
The flower fabric is from Joanns, a cotton, from a while ago. The mint green is also a cotton, a nicer quality from a quilt shop. These cottons are perfect for a hot summer day, so breezy and light.
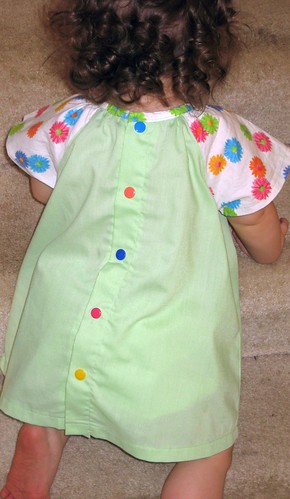
For the back closure, I replaced the buttons suggested with plastic resin snaps applied with my KAM press.
She has on bloomers underneath, in a mint green to match, made from a different pattern.
The great sewing room reorganization
How better to start off a new blog than with pictures of my newly redone sewing/office space? My space is a shared bedroom converted into an office. DH has the other little space off to the left for his desk. I get the majority of the office space.
It had gotten really cluttered and messy. The desk and bookcase were residuals from when it really was an office, when I worked at home. We had slowly migrated it more to a sewing space, keeping the computers and desks in here as well. I really needed more space for my sewing and less space for my desk/computer though now that I wasn't working from home at my desk.
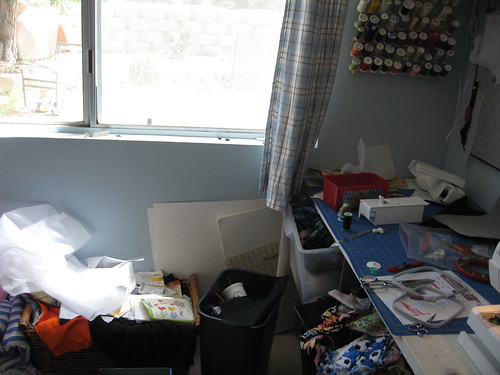
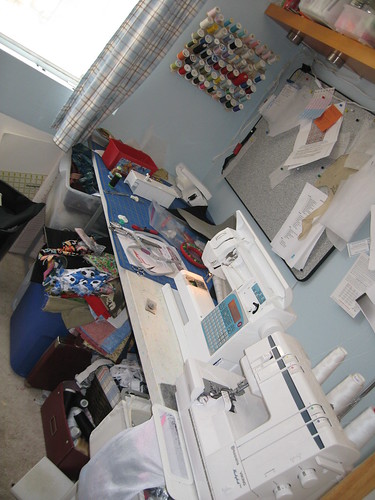
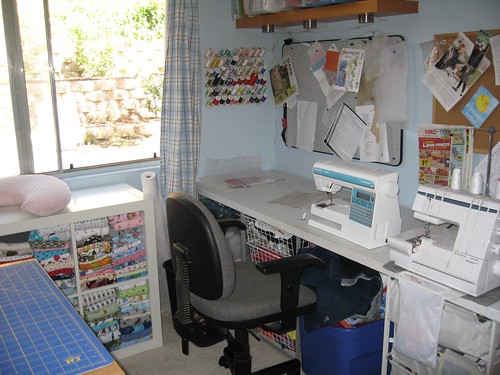
Here are a few "before" pictures. The first one shows the nice window I have, with my sewing space on the right of the picture. The big basket is overflow fabric, mending pile and "to do" list of projects. A big ole mess is what it is.
Better picture of the sewing desk itself. Underneath are my "scrap" pieces of fabric, which totally are out of control. That huge bin is full of just scrap pieces of woven material. That doesn't even show the knit scrap pieces!
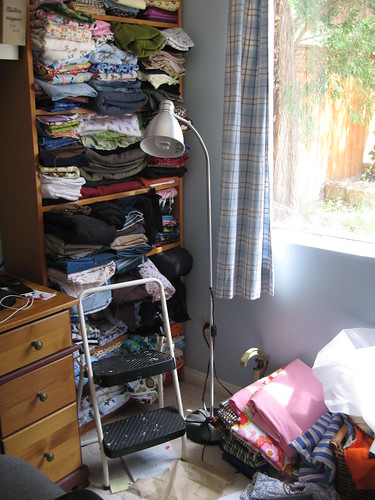
Overflowing mess of a bookcase full of fabric. The bookcase was totally not suited to storing fabric.
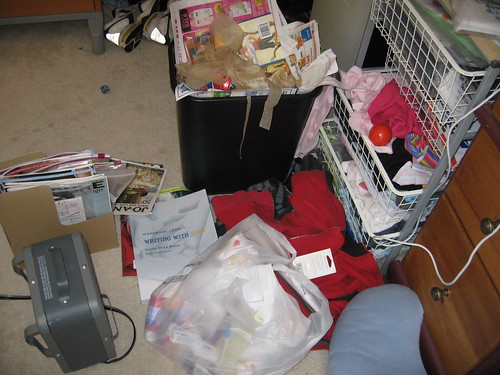
And the left side of the desk with junk on the floor, a storage area for more "to do" projects, projects in progress and two wire drawers full of the knit scrap fabric. Believe it or not, the knit scrap was worse last month before I sewed some of it up.
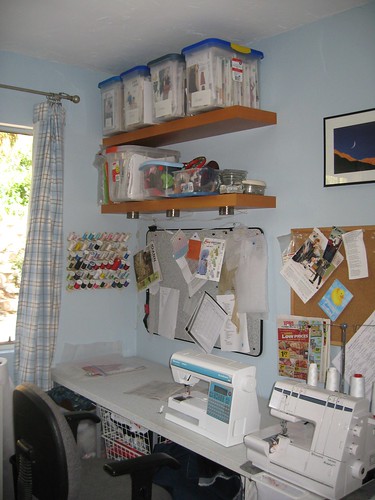
We decided to get some better storage from IKEA to start with, and it progressed from there. I now have the following "after" room. First up, the sewing area itself. Not much changed there really, except some stuff was moved so it looks nicer. The shelves were there before up high. They hold my patterns in plastic tubs. I also have some elastic and notions stored up there. One cork board holds patterns in progress or that I use a lot, my measurement charts and other sewing things. The one on the right holds general purpose desk items.
Another view, shows the sewing desk plus you can see how the old storage unit from the left of my desk tucks underneath now. It holds the same stuff, no change there. You can also see the corner of the new white storage unit under the window.
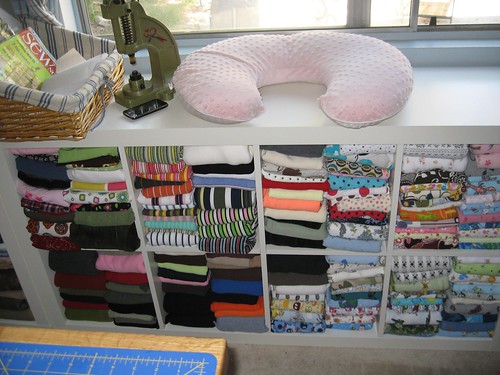
The biggest change of course was the white storage unit. This is Expedit bookcase on its side under the window. This is sooooo awesome for fabric. The cubes are perfect width and depth for ruler folded fabric. The depth is 15 inches, which is perfect for the longer 60" wide fabric ruler folded. And two stacks fit perfectly side by side. So nice.
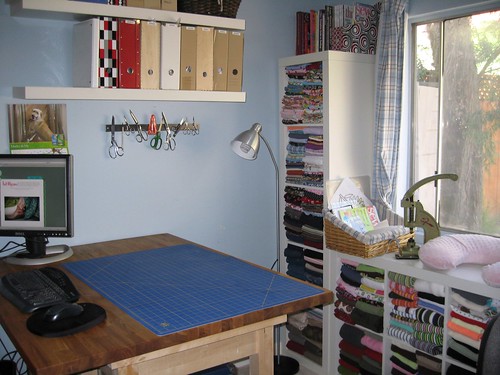
Another view, this time showing the larger Expedit shelving unit to the left of the window. I tucked my sewing books on top of that. And you can see the new large cutting table. The countertop was also IKEA, found in the "as is" section for $15! We put it on two IKEA kitchen carts we already owned that were in the kitchen. It worked out perfectly, very nice height. I stuck my cutting mat on there. The scissors are now held by an IKEA magnetic knife holder. No more hunting for scissors in a bin.
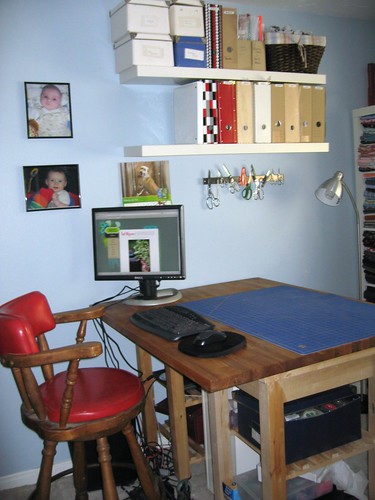
Last picture shows the cutting area. We reserved the back part of my monitor, keyboard and mouse. The laptop sits below on one of the shelves. We hauled out the old barstool from the garage. This had been a barstool from DH's grandfather, from his garage. It is a little bit too tall but the kids like it. With this setup now Zach can sit and browse with my computer or play a computer game, keeping me company while I cut or sew, and I'm right there to help him. The white shelving on the wall is also IKEA, from before. The magazine files are, yes, you guessed it, IKEA. They hold my Ottobre magazines, my Burda pattern magazines and back issues of Threads magazine and Sew News. I also store my lace, ribbon, trims, embroidery thread and other misc notions in boxes up there. The wicker basket has all my regular elastic, picot elastic and so forth.
So that is my sewing area. Anyone want to share a link to pics of theirs? :)
It had gotten really cluttered and messy. The desk and bookcase were residuals from when it really was an office, when I worked at home. We had slowly migrated it more to a sewing space, keeping the computers and desks in here as well. I really needed more space for my sewing and less space for my desk/computer though now that I wasn't working from home at my desk.
Here are a few "before" pictures. The first one shows the nice window I have, with my sewing space on the right of the picture. The big basket is overflow fabric, mending pile and "to do" list of projects. A big ole mess is what it is.
Better picture of the sewing desk itself. Underneath are my "scrap" pieces of fabric, which totally are out of control. That huge bin is full of just scrap pieces of woven material. That doesn't even show the knit scrap pieces!
Overflowing mess of a bookcase full of fabric. The bookcase was totally not suited to storing fabric.
And the left side of the desk with junk on the floor, a storage area for more "to do" projects, projects in progress and two wire drawers full of the knit scrap fabric. Believe it or not, the knit scrap was worse last month before I sewed some of it up.
We decided to get some better storage from IKEA to start with, and it progressed from there. I now have the following "after" room. First up, the sewing area itself. Not much changed there really, except some stuff was moved so it looks nicer. The shelves were there before up high. They hold my patterns in plastic tubs. I also have some elastic and notions stored up there. One cork board holds patterns in progress or that I use a lot, my measurement charts and other sewing things. The one on the right holds general purpose desk items.
Another view, shows the sewing desk plus you can see how the old storage unit from the left of my desk tucks underneath now. It holds the same stuff, no change there. You can also see the corner of the new white storage unit under the window.
The biggest change of course was the white storage unit. This is Expedit bookcase on its side under the window. This is sooooo awesome for fabric. The cubes are perfect width and depth for ruler folded fabric. The depth is 15 inches, which is perfect for the longer 60" wide fabric ruler folded. And two stacks fit perfectly side by side. So nice.
Another view, this time showing the larger Expedit shelving unit to the left of the window. I tucked my sewing books on top of that. And you can see the new large cutting table. The countertop was also IKEA, found in the "as is" section for $15! We put it on two IKEA kitchen carts we already owned that were in the kitchen. It worked out perfectly, very nice height. I stuck my cutting mat on there. The scissors are now held by an IKEA magnetic knife holder. No more hunting for scissors in a bin.
Last picture shows the cutting area. We reserved the back part of my monitor, keyboard and mouse. The laptop sits below on one of the shelves. We hauled out the old barstool from the garage. This had been a barstool from DH's grandfather, from his garage. It is a little bit too tall but the kids like it. With this setup now Zach can sit and browse with my computer or play a computer game, keeping me company while I cut or sew, and I'm right there to help him. The white shelving on the wall is also IKEA, from before. The magazine files are, yes, you guessed it, IKEA. They hold my Ottobre magazines, my Burda pattern magazines and back issues of Threads magazine and Sew News. I also store my lace, ribbon, trims, embroidery thread and other misc notions in boxes up there. The wicker basket has all my regular elastic, picot elastic and so forth.
So that is my sewing area. Anyone want to share a link to pics of theirs? :)
New blog but not new to blogging
This is my new sewing blog, though I'm not new to blogging. My regular blog has become such a mishmash of topics that I'm breaking out a large section of my blogging, my sewing, and giving it it's own blog. So, if you like to read about my sewing but not necessarily all the other randomness going on in my head and my blogging, this is the place to visit.
I'm not sure at this time if I'm going to migrate my old sewing posts onto this blog or leave them at my old blog. So, if you are looking for my old tutorials or sewing posts, as of right now they still reside on my old blog, Everyday Adventures under the sewing tag.
I'm not sure at this time if I'm going to migrate my old sewing posts onto this blog or leave them at my old blog. So, if you are looking for my old tutorials or sewing posts, as of right now they still reside on my old blog, Everyday Adventures under the sewing tag.
Subscribe to:
Posts (Atom)