ORIGINAL POST:
So, a while back I did Ottobre pants, slim fits, but they were still too large for Zach. I eventually set them aside for a growth spurt. He has had said growth spurt and they fit okay in length and better in hip now ... but still much too large in the waist.
So original pants are here, but larger actually than they appeared, i.e., they fell down when he walked:

Thanks to the Ottobre English yahoo group, I was given verbal instructions on how to fit them, by inserting buttonhole elastic into the waistband. This would have been a lot easier had I done this in the first place by the way. But, they were already created and he wanted to be able to wear them, so I did the retrofit. Sorry the pictures are crummy but hopefully will be helpful to you all who need to do this for any of your tall skinny kids. :)
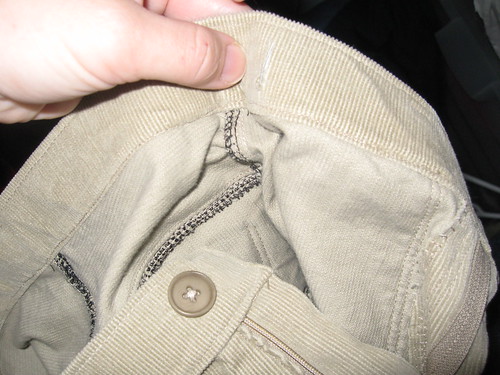
It is very very handy if you have an existing pair of pants with buttonhole elastic in them to refer to on placement. This is not essential, but it is helpful. Take the pair you need to modify and look on the inside of the waistband. Choose a spot for the opening for the elastic to go in. A good place for this is usually just past the side seams toward the front so that it would rest approximately between the side seam and the center front. There is going to be a button just past it so try to pick the place you think would be most comfortable on wearing. On the pants in the photo, I have my thumb at approximately that place. You can see the side seam in the photo:

Now get your seam ripper. Very carefully cut a vertical slit in the only the inner waistband at the site chosen above. Be careful not to cut the outer waistband (the part you see on the outside when the pants are being worn). The slit needs to be ideally the width of your buttonhole elastic.

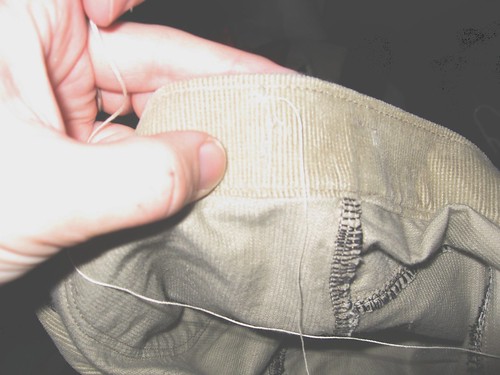
In my pants example, the fabric is corduroy. It will fray badly if left just cut. If your pant fabric will not fray, you may be able to insert the elastic now. Most fabrics though you will need to do a handsewn buttonhole. Note you can probably sew the buttonhole first and then cut it open like you would on a machine; however, it is a little easier to cut first in this instance for me so I could be careful not to catch the outer waistband in my sewing. Anyhow, sew the buttonhole by hand. I did the extra step of adding Fray Check on the raw edges to help stop the raveling. I started at one end with tacks across the opening to reinforce the ends, down one side, wide across the buttom and back up the other side. Most anyone will end up with a prettier result than me because I really am bad at handsewing. LOL.
Starting the buttonhole sewing:

Do the buttonhole on both sides.
Now you need to sew a button on each side just a little ways in front of each hole. Mine are 1 inch from the buttonhole. Choose a button that comfortably goes through the holes in your buttonhole elastic but do not allow it to slip back through.

All that is left to do now is thread your buttonhole elastic into the casing. Cut a length of elastic the distance from one button to the other along the back waistband. The object is that if it were inside the waistband unstretched there would be no reduction in the waistband; the waistband would be the original length (so if your child grows you are all set!). Feed it through one end into your buttonhole created. I use a bodkin for it but a safety pin works well too. Hook one end on one button, pull it through and hook the other end on the other button. Adjust it by pulling tighter or loosening to fit your child. Put the button through the appropriate hole.

Enjoy the fact the pants no longer fall down!

Thanks I needed this tutorial to take in some store bought pants for my son.
ReplyDelete